
Yep, you read that right. Today, we’re making homemade butter.
Why?
Well, IDK bout you, but this whole COVID-19 quarantine situation has had us cutting our weekly grocery shopping down to bi-weekly. And in the interest of saving time (most grocery stores now limit the number of customers inside at one time, so the lines to get inside have been EXTRA long and take forever) we’ve also been avoiding those quick trips to the store in between shops for just one or two items.
The past two times I’ve done our shopping, I wasn’t able to find the butter we like. Wah wah, right? Well, eating organic grass-fed butter is important to us (first world problems) because we avoid grain-fed animal products, and we try to consume as organic as possible (don’t even get me started on the health effects of the chemicals in food and animal feed). It’s one of those things that I’d rather do without than compromise (again, first world problems).
I started wondering to myself, “how freakin’ hard can it actually be to make your own butter?” The answer? It’s not hard at all.
So whether you find yourself short on store-bought butter, or you just enjoy a good DIY project, here’s how to make your own butter!
This is just your regular run-of-the-mill sea salt butter. But, at the end of this tutorial, I’ll also provide a recommendation for another flavor you might like!
HOMEMADE SEA-SALT BUTTER
Yields 1 stick of butter (1/2 cup or 3.5 ounces) and 1 cup of buttermilk
Ingredients:
-1 pint (2 cups) heavy whipping cream (if you want organic, grass-fed butter, make sure you use organic, grass-fed heavy whipping cream)
-1/8 tsp. sea salt
Directions:
Step 1: Pour heavy whipping cream into a large, deep mixing bowl.
If you don’t have mixing bowls, I recommend these ceramic ones – they’re awesome quality and a very pretty design too!

Step 2: Using a handheld mixer on med-high power, mix the liquid. I have this particular mixer and I love it.
Step 3: After approximately 7 minutes of mixing, the liquid will begin to thicken and resemble whipped cream. Keep mixing.

Step 4: At around the 17-minute mark, the liquid will begin to change in consistency and start to form small butter chunks – I honestly think it looks like riced cauliflower at this stage. You’ll also start to see bits of milky liquid forming. Keep mixing.
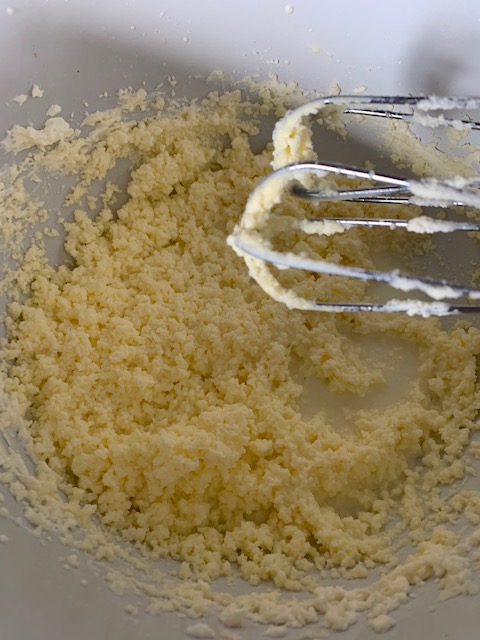
Step 5: At around the 21-minute mark, the small bits of butter will begin to form larger chunks, and there will be a lot more milky liquid. You’ll know you’re done mixing when the mixture is 50/50 butter chunks and milky liquid.
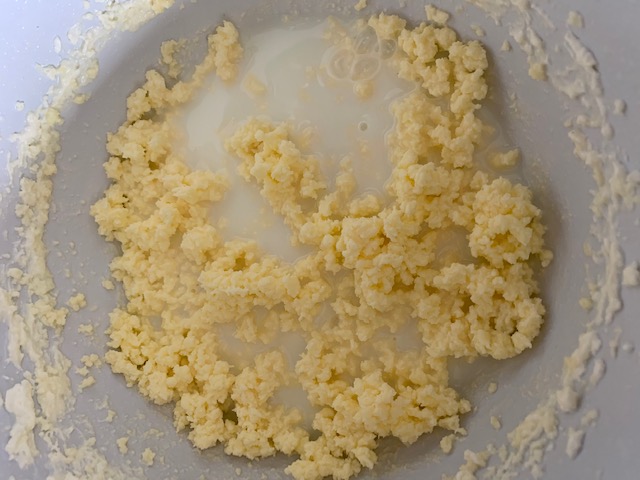
Step 6: Carefully pour the milky liquid into another container – be careful not to let your butter chunks fall in!
This milky liquid is homemade buttermilk! You can store it in your fridge and use it in another recipe. If you plan to bake with it, you’ll need to add vinegar or lemon juice to ensure it reacts with the baking soda properly – just Google it.

Step 7: The remaining mixture is homemade butter! But we’re not done yet.
Now we need to “wash” the butter, to ensure we remove all the excess buttermilk. Otherwise, the butter will sour.
Squeeze and massage your butter, forcing out the excess buttermilk.
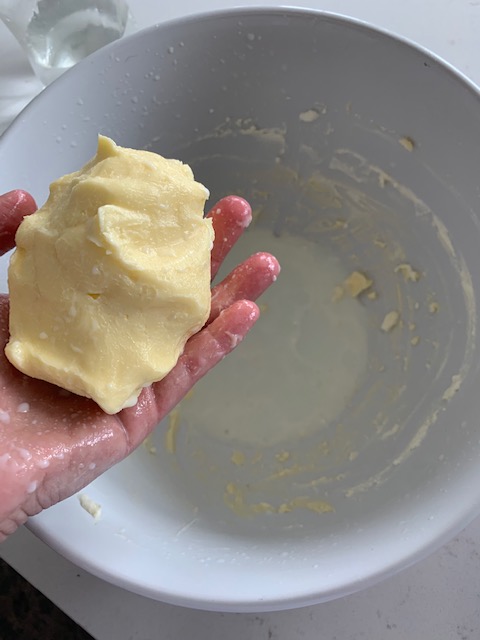
Fill a medium mixing bowl with ice-cold water. Immerse the butter and again, squeeze and massage it to remove the buttermilk. You’ll notice the water turning milky.

Change out the water and repeat this process 1-2 times, until the water runs clear.

Step 8: Transfer your butter to a paper towel and pat it dry.
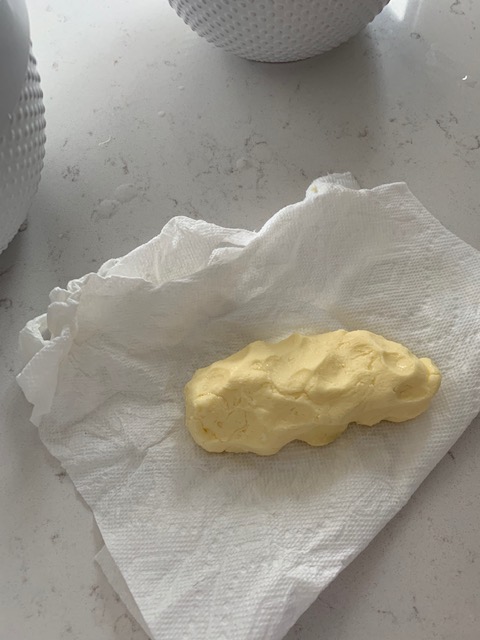
Step 9: In a small dish, transfer the butter and add 1/8 tsp. sea salt. Mix well. Ta-da! You’ve got homemade butter!
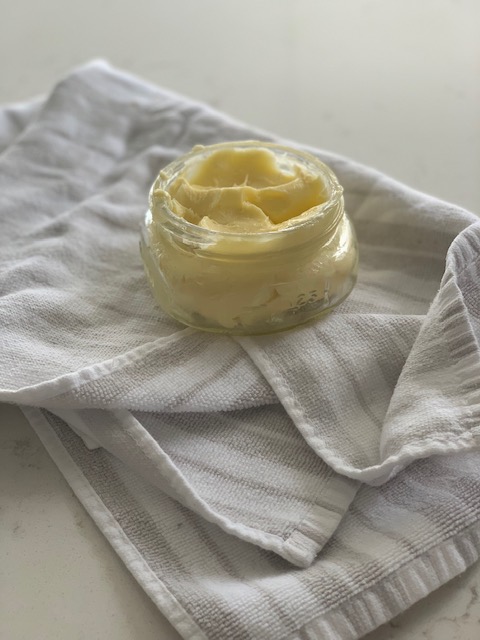
Step 10: Store your butter in your fridge for up to 1 week, or freeze it for later use.
I use these containers for freezer storage. If you plan to freeze your butter, just remember to leave a little extra room inside the container – the butter will expand slightly when frozen.
ANOTHER BUTTER FLAVOR YOU MIGHT LIKE:
I made a batch of Truffle-Salt and Herb Butter and damn yo, it was PHENOM.
Literally, the actual best thing ever for fresh bread, mashed potatoes, mac and cheese, or even just for the top of a juicy steak.
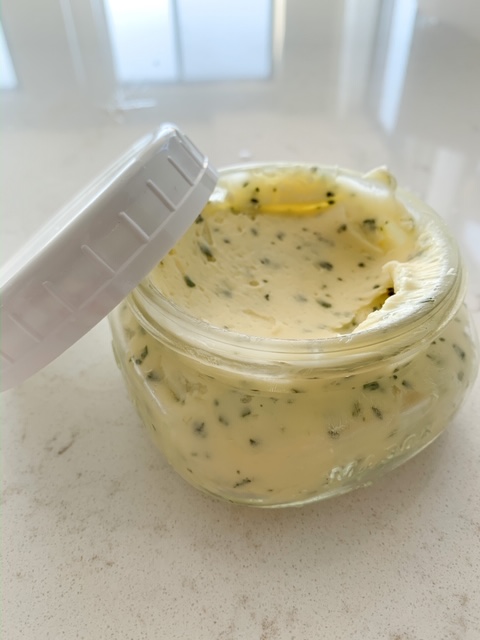
I used 1/4 tsp. of Primal Palate Truffle Salt, 1/4 tsp. dried parsley and 1/4 tsp. dried thyme.
P.S. the quality of the spices you use has a direct impact on how your food tastes – always choose high quality spices! I love Primal Palate for their commitment to organic ingredients, plus, they are NON-GMO, Gluten-free and Whole-30 approved. Plus, they are a Pittsburgh company, and you know how I love to support local! Check them out.
Let me know how your butter turns out! And if you come up with some cool flavors, I’d love to hear!
Hey kids! Just a heads up that this post may contain affiliate links to products I love and use. If you take action after clicking one of these links (i.e. subscribe, make a purchase, etc.) I’ll earn a bit of a commission, which helps me keep this blog up and running – so you can keep finding dope recipes like this one to recreate yourself! Thanks in advance for supporting The Northeast Ginger – xoxo Gossip Girl


Leave a comment