I know what you’re thinking…”a balloon garland…Seriously? That’s a bit over the top for Valentine’s Day, don’t you think?” Yep. Sure is.

But last Valentine’s Day fucking sucked. Real bad. So let me just have this moment, OK?
Last year, I had a newborn baby and was struggling with severe anxiety. Like, can’t eat, can’t sleep, constant panic and mood swings. So I saw a psychiatrist and was wrongly diagnosed with postpartum anxiety (we later found out it was caused by a very high dose of medication I was taking to treat my narcolepsy, which I’d been off of for my whole pregnancy and my body was readjusting to it). The psychiatrist prescribed an antidepressant. It made my anxiety skyrocket. So she switched me to another kind of antidepressant.
I started feeling the effects on Valentine’s Day. We went to breakfast to enjoy a special family meal together and I couldn’t even hold a conversation. I was so out of it I just kept staring into space, floating out of my body. My arms felt so heavy that I didn’t even want to pick up my fork. I didn’t want to hold my daughter. She giggled, laughed and tried to get my attention, and I wanted nothing to do with her. I was a zombie.
My husband quickly commented that something wasn’t right. So I got in touch with the doctor and she advised me to stop treatment. Simultaneously, I stopped taking my narcolepsy meds + the anxiety disappeared overnight. I worked with my sleep specialist to find more holistic remedies, rather than pumping my body full of harmful drugs.
I haven’t taken my narcolepsy meds in a year and I haven’t had anxiety like that since then.
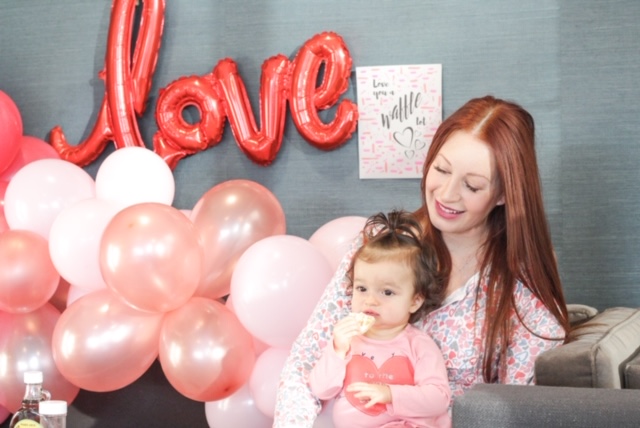
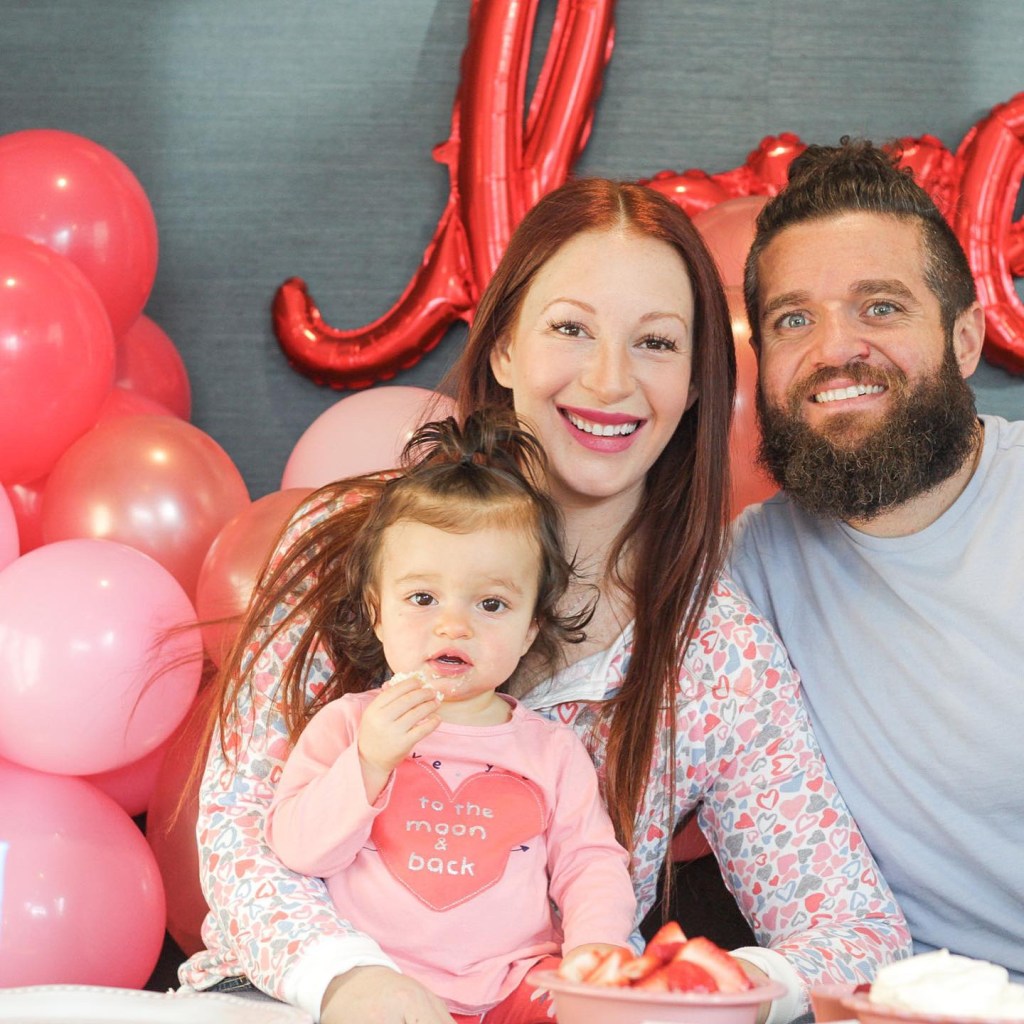
So this Valentine’s Day, I’m celebrating the fact that I get to be here, fully present, with my amazing family. So ya, a balloon garland seemed appropriate.
HOW TO:
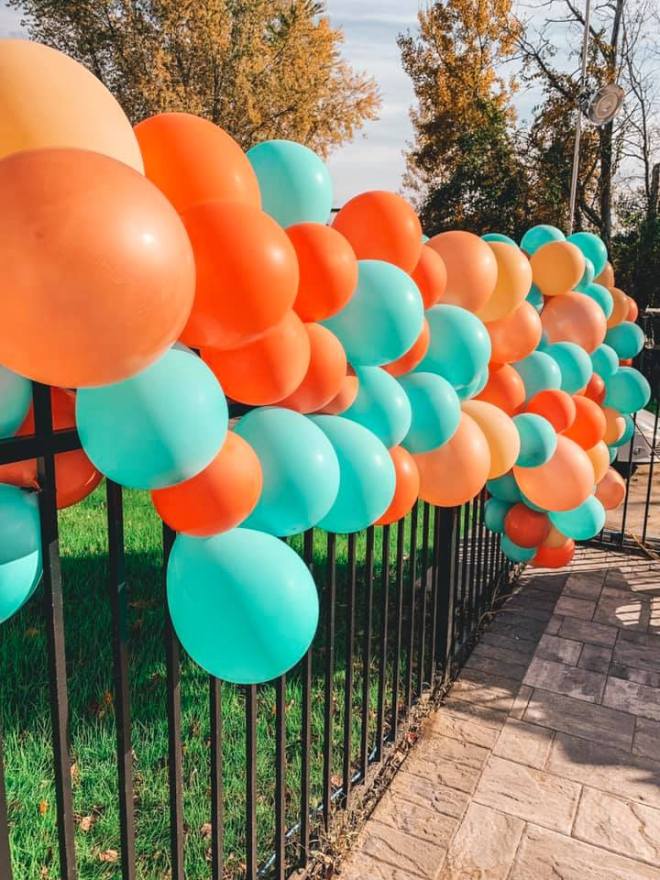
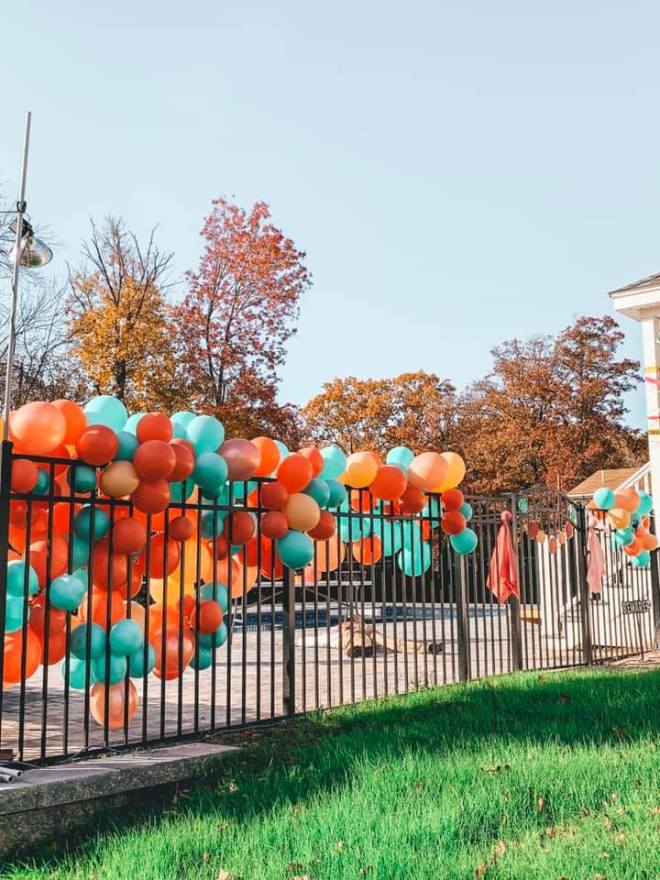
This is just a little garland, compared to the monster we put together for Ro’s first birthday party. Click here to check out the pics from that, which used 250 balloons!
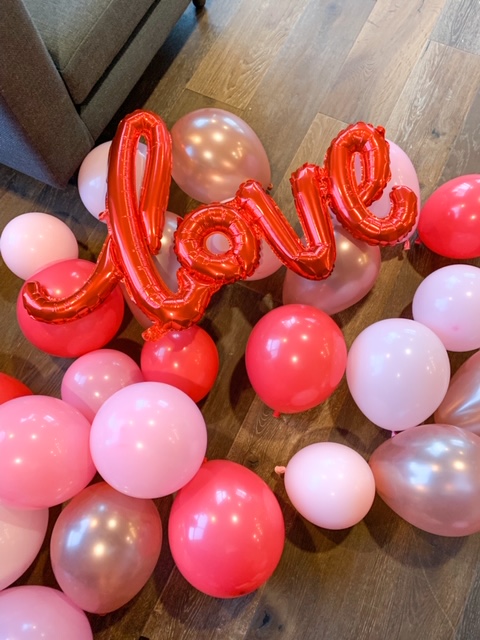
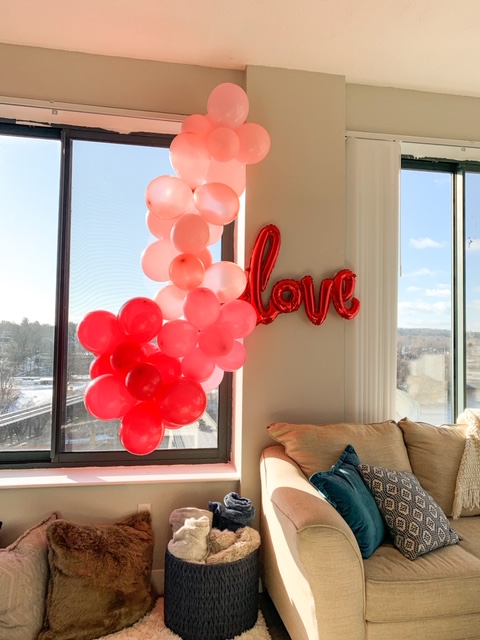
For a small garland like this, you’ll only need about 50 balloons. I get mine at the local party store. I chose four different shades in reds and pinks.
I also picked up this “love” balloon that I found at Target.
First thing is first: you do not need helium for this. Just plain old air is great.
Once blown up, the balloons will keep for about a week if you keep them indoors. In our experience, they stay fully inflated for about 2-3 days when kept outside. So this is definitely something you can start ahead of time.
Step 1: Blow up your balloons.
I like for them to vary in size, so some are fully inflated, and others are a bit smaller.
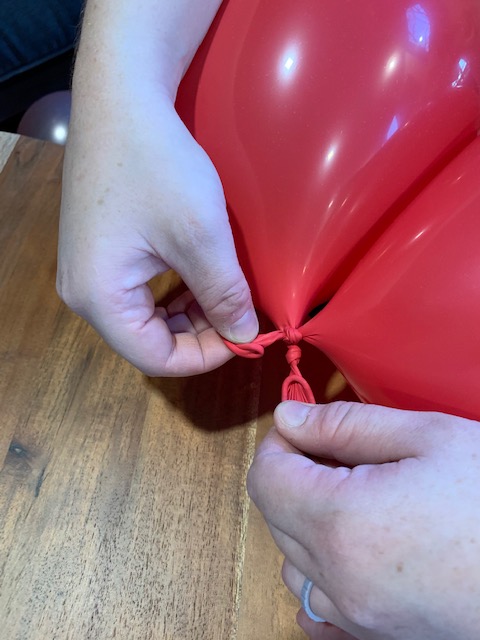
Step 2: Once all your balloons are inflated and tied off, you’ll need to start bunching them together. To do this, you’re going to tie two balloons together.
Take the knotted end of each balloon and tie them together, just like you’d tie any other knot.
For this particular garland, I wanted bunches of the same color. See how each color is grouped together?
If you want yours like this, you’ll simply ensure that you’re tying two balloons of the same color together.
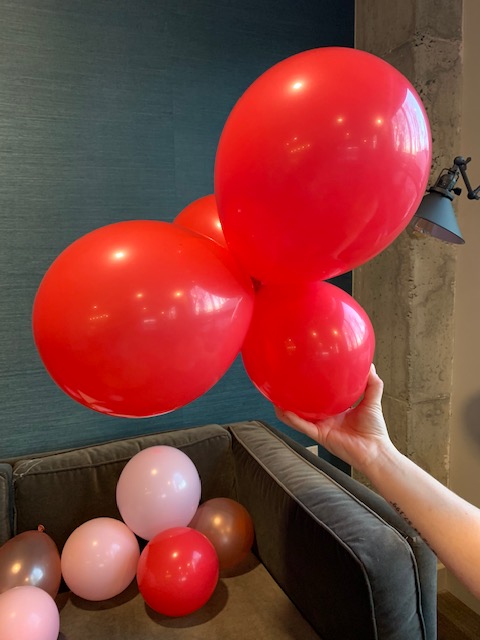
But, for Ro’s birthday garland, I tied varying colors together in the same bunch so that no one color was overtly grouped together. See the difference?
If you want your garland to look like this, you’ll tie two balloons in DIFFERENT colors together.
Step 3: Once all your balloons are in pairs, you’ll start grouping the pairs together to make bigger bunches.
Take two pairs of balloons and place the knots over each other, forming a cross.
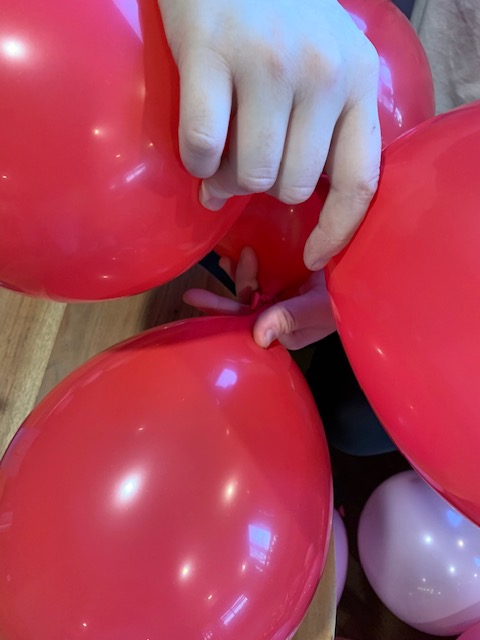
Twist the balloons around each other, so that the knots become twisted together. The result will be a bunch consisting of four balloons.
Again, if you want your colors to be grouped together, combine two pairs of balloons in the same color.
If you want varying colors throughout the garland, combine two pairs of balloons in DIFFERENT colors.
Step 4: Assemble your garland.
Your technique will vary depending on where you’re placing your garland.
If you’re using it as a table centerpiece, or a backdrop on your couch, all you have to do is arrange the balloon bunches. They’ll stay in place on their own.
If you want to hang them from a curtain rod, I would suggest using a long piece of twine (that’s what I did below).

Tie it to the first balloon bunch, then twist the remaining bunches around the string.
I used masking tape to affix the “love” balloon to the wall.
For Ro’s birthday party, we wanted the garland to flow across the gate to the pool, so we used zip ties to anchor the balloon bunches onto the gate. Once they were in place, you couldn’t even see the zip ties (we chose a color that matched the gate).


Leave a comment